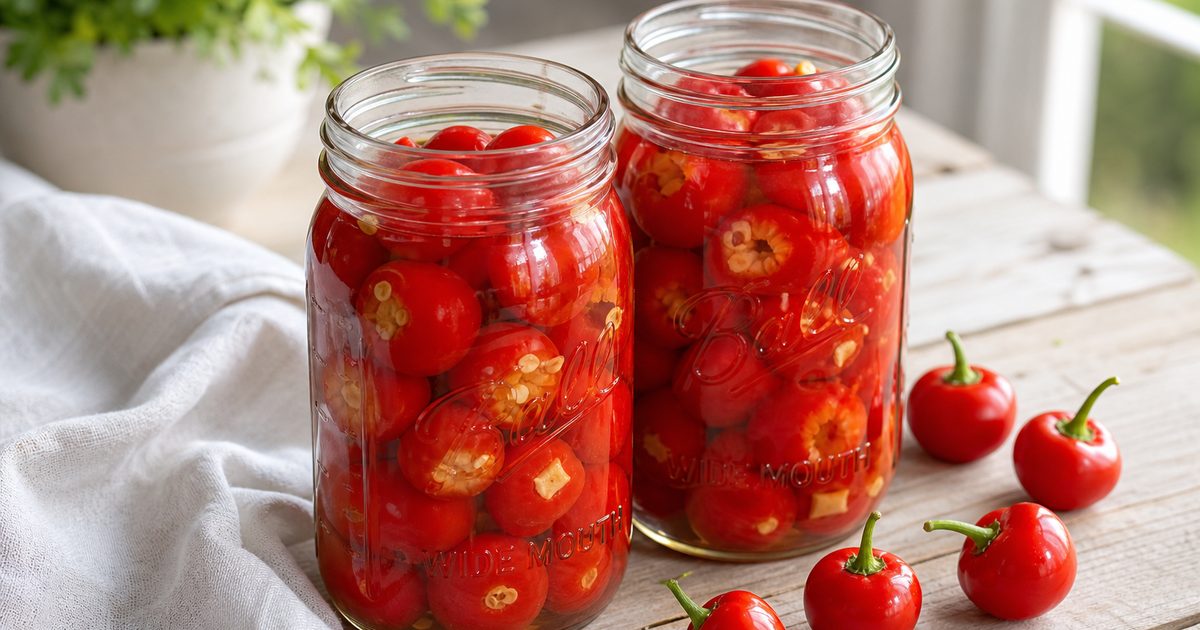
A good sandwich can go flat fast. Add one pickled cherry pepper, though, and suddenly you get crunch, heat, and enough acidity to wake up the whole plate. This pickled cherry peppers recipe is a simple refrigerator method that gives you two pint jars of bright, tangy peppers with garlic, mustard seed, and bay.
The key step is small but important: pierce each pepper before it goes into the brine. That lets the liquid move inside, so the peppers pickle evenly instead of staying bland in the center.
Prep time: 10 to 30 minutes
Cook time: 5 to 10 minutes
Total time: 30 minutes to 1 hour, plus cooling and 1 week of chilling
Yield: 2 pint jars
Ingredients for pickled cherry peppers
For 2 pint jars, you will need:
- 1 pound (450 g) cherry peppers
- 4 cloves garlic, peeled
- 2 cups (470 ml) white vinegar, distilled or white wine
- 3/4 cup (177 ml) water
- 2 tablespoons (25 g) sugar
- 1 tablespoon (15 g) coarse salt or pickling salt
- 1 teaspoon (5 g) mustard seeds
- 1 teaspoon (5 g) black peppercorns
- 2 bay leaves
Allergen note: This recipe does not contain the major common allergens on its own, but always check your vinegar and spices if you are cooking for someone with sensitivities.
Heat note: Cherry peppers can irritate skin and eyes. Wear gloves if you are sensitive to chile peppers, and wash your hands well after handling them.
How to make pickled cherry peppers
Start with two clean pint jars and lids. Since these are refrigerator pickles, you do not need to process them for shelf storage.
-
Wash the cherry peppers well and dry them.
-
Pierce each pepper a few times with a fork or the tip of a small knife. Do not skip this. It is what helps the brine season the inside.
-
Pack the peppers into the two jars. Tuck in the garlic cloves and bay leaves as you go.
-
In a saucepan, combine the vinegar, water, sugar, salt, mustard seeds, and black peppercorns.
-
Bring the brine to a boil over medium-high heat. Stir until the sugar and salt dissolve.
-
Lower the heat and simmer for 5 to 7 minutes. This gives the spices time to flavor the liquid.
-
Add the peppers to the simmering brine and cook for about 5 minutes, until they are slightly tender but still firm.
-
Using a spoon or tongs, divide the peppers between the jars if needed. Pour the hot brine over them, making sure the peppers are fully submerged. Leave about 1/4 inch of headspace at the top of each jar.
-
Let the jars cool to room temperature.
-
Cover and refrigerate.
For the best flavor, wait about 1 week before eating. That rest time makes a big difference.
Why pickled cherry peppers need to be pierced
This is the part that separates a good jar from a disappointing one. Cherry peppers have sturdy skins, and whole peppers resist the brine. If you leave them unpierced, the outside tastes pickled while the center stays plain.
A few small holes solve that problem. The vinegar mixture can move into the flesh, and the peppers pickle more evenly. You get better flavor all the way through, plus a more pleasant texture.
The short simmer helps too. It softens the peppers just enough so they are easy to bite, but they should still hold their shape. You are not cooking them until limp.
Tips for the best pickled cherry peppers
A few practical details make this recipe easier.
Use clean jars. For a refrigerator pickle recipe, clean hot soapy jars are enough. If you want shelf-stable jars, you need a tested water bath canning recipe and proper processing. This version is for the fridge only.
Pack the peppers snugly. That helps keep them under the brine.
Keep the headspace small. About 1/4 inch is right for pint jars.
Make sure the peppers stay submerged. If a few float up at first, press them down gently after the jars cool.
Give them time. You can taste one earlier, but the flavor improves after about a week.
If you have been looking for how to pickle cherry peppers without a complicated canning setup, this is the easy route.
Variations for pickled cherry peppers
This recipe is flexible, as long as you keep the main brine ingredients and amounts the same.
- Use apple cider vinegar: The flavor turns a little rounder and fruitier.
- Try white balsamic with white vinegar: Use it as part of the vinegar, not a full replacement, for a softer edge.
- Add dill or coriander seeds: These fit naturally if you like a more herb-forward jar.
- Halve and seed the peppers: This gives you a milder result and works well if you want stuffed cherry peppers later.
- Swap in other small peppers: Jalapeños or serranos can work with the same method, though the heat level will change.
If you want sweet pickled cherry peppers, the easiest adjustment is to lean into serving ideas rather than changing the brine ratio too much. Pair them with rich meats, cheese, or olives and they read sweeter against salty foods.
How to use pickled cherry peppers
Once you have a jar in the fridge, they disappear quickly.
Slice pickled cherry peppers into sandwiches, especially Italian-style subs or grilled sausage rolls. Add them to antipasto platters with salami, provolone, olives, and artichokes. Chop them into tuna salad, potato salad, or pasta salad for extra bite.
They also work well next to roast chicken, grilled pork, or anything rich and fatty. A few pieces can cut through a heavy meal fast.
If you like Italian pickled cherry peppers, this flavor profile will feel familiar: sharp vinegar, garlic, and a gentle spice from mustard seed and peppercorns.
Do not throw out the brine. A spoonful can sharpen vinaigrettes or add zip to a Bloody Mary.
Storage and safety for pickled cherry peppers
These are refrigerator pickles. Store the jars in the fridge after they cool.
They are best within 2 to 3 weeks for texture, though they may last longer if kept cold and handled cleanly. Use a clean fork each time you remove peppers, and discard the jar if the brine turns cloudy in an unusual way, smells off, or shows mold.
Freezing is not a good option. The peppers lose their texture once thawed.
This recipe does not include meat or eggs, so there is no internal temperature guidance needed here. The main food-safety point is storage: keep the jars refrigerated and do not leave them at room temperature for long periods after opening.
If you want a pantry-stable version of pickled cherry peppers, use a tested canning recipe made for water bath processing rather than this refrigerator method.
Common mistakes with pickled cherry peppers
The biggest one is skipping the piercing step. That leads to uneven pickling.
Another common problem is overcooking. Five minutes in the simmering brine is usually enough. The peppers should soften slightly, not collapse.
Using dirty jars can shorten storage life. Wash them well before filling.
The last issue is impatience. Freshly made peppers taste sharp and one-note. After a week, the garlic and spices settle in, and the whole jar tastes more balanced.
FAQ about pickled cherry peppers
Do I have to pierce cherry peppers before pickling?
Yes. Piercing helps the brine get inside. Without it, the centers can stay under-seasoned.
How long do pickled cherry peppers take before they are ready?
They are best after about 1 week in the refrigerator. You can taste them sooner, but the flavor will be less developed.
Can I use other peppers for this pickled cherry peppers recipe?
Yes. Small firm peppers such as jalapeños or serranos work well, though they may be hotter.
Are pickled cherry peppers spicy?
They usually have moderate heat. They are often milder than jalapeños, but heat can vary from pepper to pepper.
Can I can these pickled cherry peppers for shelf storage?
Not with this exact refrigerator method. For shelf-stable jars, use a tested water bath canning recipe designed for safe preservation.