
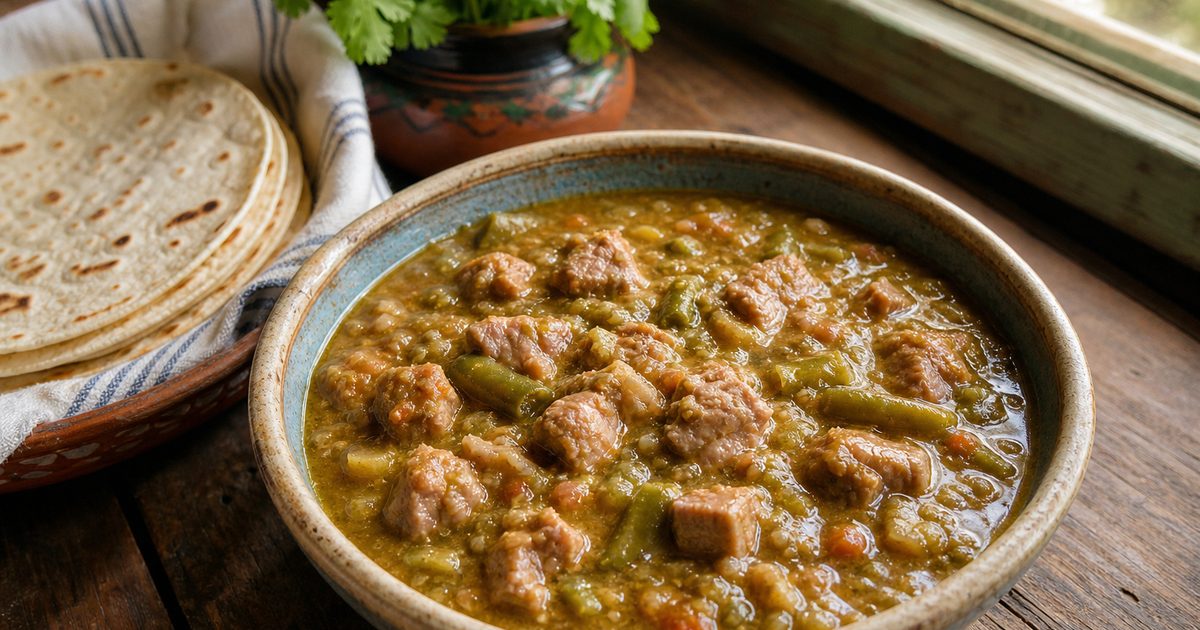
One spoonful tells you this is not a thin green chile stew. Santiago’s Green Chili is thick, rich, and built to cling to a burrito or settle over eggs without running all over the plate. The pork turns tender, the tomatoes give the pot its orange cast, and the roux brings that signature gravy-like body people look for in a good Santiago’s Green Chili copycat.
This version makes 8 servings and stays close to the method that gives Santiago’s Green Chili its familiar texture. Prep takes 25 to 30 minutes. Cook time runs 1 hour 15 minutes to 1 hour 20 minutes, so plan on about 1 hour 45 minutes to 1 hour 50 minutes total.
Ingredients for Santiago’s green chili
- 1 lb (450 g) diced pork, cut into 1/4- to 1/2-inch pieces
- 1/2 cup (120 g) lard, plus 1 tablespoon (15 g) additional lard
- 4 cloves garlic, pressed
- 1 cup (110 g) finely chopped onion
- 1 1/2 tablespoons (13.5 g) ground dry mustard powder
- 1 teaspoon black pepper
- 1 teaspoon dried oregano
- 1/4 teaspoon dried sage
- 1/4 teaspoon ground cumin
- 1 can (14 oz/397 g) diced tomatoes
- 1 can (6 oz/170 g) tomato paste
- 3 cans chicken broth, about 42 oz (1.2 L) total
- 1 1/2 cups (about 225 g) green chilies, mild or hot, or a mix
- 1 1/2 cups (about 225 g) canned jalapeños, not pickled
- 2 cups (470 ml) water
- 1 cup (125 g) all-purpose flour
- 2 tablespoons (30 g) chicken bouillon powder
How to make Santiago’s green chili
-
Blend the chile base. Puree the green chilies, jalapeños, and diced tomatoes in a blender or food processor until smooth. Set aside.
-
Brown the pork. Heat 1 tablespoon lard in a large heavy pot over medium-high heat. Add the diced pork and cook until browned on the outside.
-
Cook the onion. Add the chopped onion and cook for 3 to 4 minutes, stirring now and then, until softened.
-
Bloom the seasonings. Stir in the dry mustard, black pepper, oregano, sage, cumin, and garlic. Cook for 1 minute, stirring constantly so the garlic does not burn.
-
Simmer the meat. Pour in the blended chile mixture, 1 can of chicken broth, and 1 cup water. Bring to a simmer, then lower the heat and cook gently for 1 hour.
-
Add the tomato paste. Stir in the tomato paste and keep the pot at a low simmer.
-
Make the roux. In a medium saucepan, melt the remaining 1/2 cup lard over medium-low heat. Add the flour and chicken bouillon powder. Stir constantly for 2 to 3 minutes until smooth.
-
Thin the roux slowly. Gradually whisk in the remaining 2 cans of chicken broth and the remaining 1 cup water, a little at a time. Keep whisking until the mixture is smooth and pourable.
-
Finish the chili. Pour the roux mixture into the pot and stir well. Simmer for 15 to 20 minutes, stirring occasionally, until the chili thickens.
That final texture should coat a spoon. If you want a bowl of Santiago’s Green Chili that looks right, do not rush the last simmer.
Why Santiago’s green chili is so thick
The roux is the difference between a loose pork chile and Santiago’s Green Chili. Flour, lard, and bouillon build a thickener that gives the pot its body. When you whisk in the broth slowly, the roux stays smooth and blends into the chili instead of forming lumps.
A few details help here:
- Cook the flour mixture until it looks smooth and glossy.
- Add liquid little by little, not in one splash.
- Whisk the whole time.
- Let the chili simmer after the roux goes in so it can tighten up.
If your chile stays thin, the roux usually caused it. Either the flour did not cook long enough, or the broth went in too fast. Sometimes the pot simply needs another few minutes at a gentle simmer.
Tips for the best Santiago’s green chili
Use pork cut into small, even pieces. That helps it cook at the same pace and gives you tender bites throughout the pot.
Choose your heat level before you start. Mild green chilies make a gentler batch. More jalapeños bring sharper heat. If you like a hotter bowl, shift the ratio toward jalapeños. If you want it softer, lean on mild green chilies.
Watch the garlic closely. One minute is enough. Burned garlic will leave a bitter edge in the whole pot.
A heavy-bottomed pot helps. This chili is thick, so it can catch on the bottom if the heat is too high or the pot is thin.
Substitutions and variations for Santiago’s green chili
A few swaps work well without changing the dish too much.
- Pork shoulder instead of leaner pork: Pork shoulder is a common choice if you want richer flavor and softer texture after simmering.
- Pork broth instead of chicken broth: This gives the chili a deeper pork flavor.
- Fresh roasted chilies instead of canned: Roast and peel fresh green chilies and jalapeños before blending. This takes more time, but it works well.
- Gluten-free option: Replace the flour-based roux with a cornstarch slurry. The chili will thicken, though the texture will be a little different.
There is also a vegetarian route. Omit the pork, use vegetable broth, and add vegetables or beans if you like. It will not taste the same as the original style, but the thick chile base still works.
How to serve Santiago’s green chili
This is the kind of chili that belongs on comfort food. Spoon Santiago’s Green Chili over burritos, smother breakfast eggs, or ladle it into bowls on its own.
It also fits naturally into the Colorado style many people search for when they want Colorado green chili or a green chili recipe with pork. Because it is thick, it stays where you put it. That makes it especially good for smothered burritos and breakfast plates.
If you serve it as a main dish, warm tortillas on the side make sense. If you use it over eggs, keep the eggs simple and let the chili do the work.
Food safety and allergen notes
This recipe contains:
- Gluten from the all-purpose flour
- Soy may be present in store-bought broth or bouillon, depending on the brand
For food safety, cook pork to at least 145°F (63°C) and let it rest 3 minutes. In this recipe, the pork simmers long enough to become fully cooked and tender, but checking with a thermometer is still smart.
When blending hot or warm ingredients, do it carefully. If the chile mixture is hot, vent the blender lid and blend in small batches to avoid pressure buildup.
Refrigerate leftovers within 2 hours. Thick dishes cool slowly, so divide leftovers into smaller containers if you want them to chill faster and more safely.
Storing and reheating Santiago’s green chili
Let the chili cool slightly, then transfer it to airtight containers.
- Refrigerator: 3 to 4 days
- Freezer: up to 3 months
Thaw frozen chili overnight in the refrigerator.
To reheat, warm it on the stovetop over medium-low heat or microwave it in short bursts, stirring between each round. If it thickens more in the fridge, add a small splash of broth or water while reheating to loosen it.
FAQ about Santiago’s green chili
What makes Santiago’s green chili different?
The big difference is texture. Santiago’s Green Chili is thick and spoon-coating, almost like gravy, with pork throughout and an orange tint from tomatoes.
Why is my Santiago’s green chili not thickening?
The roux is usually the issue. Cook the flour and lard until smooth, whisk in the liquid gradually, and simmer the chili long enough after adding the roux.
Can I make Santiago’s green chili less spicy?
Yes. Use mild green chilies and reduce the jalapeños. Since the heat comes mainly from the peppers, that is the easiest way to adjust it.
Can I use fresh chilies instead of canned?
Yes. Roast and peel fresh green chilies and jalapeños first, then blend them with the tomatoes. Canned chilies are simply more convenient and often more consistent in heat.
What should I serve with Santiago’s green chili?
It is great over burritos, eggs, or as a bowl on its own. Many people also use it as a smothered burrito sauce because it stays thick and hearty. For a complementary side, consider serving it with Calabacitas, a New Mexican dish that pairs well with grilled meats and enchiladas.